
This guide outlines how to install Adobe Creative Cloud for Windows and the apps that come with it.
If you are using a Day Loan or a Long Term Loan, this guide does not apply. Please come to IT to get Adobe Creative Cloud and it’s apps installed.
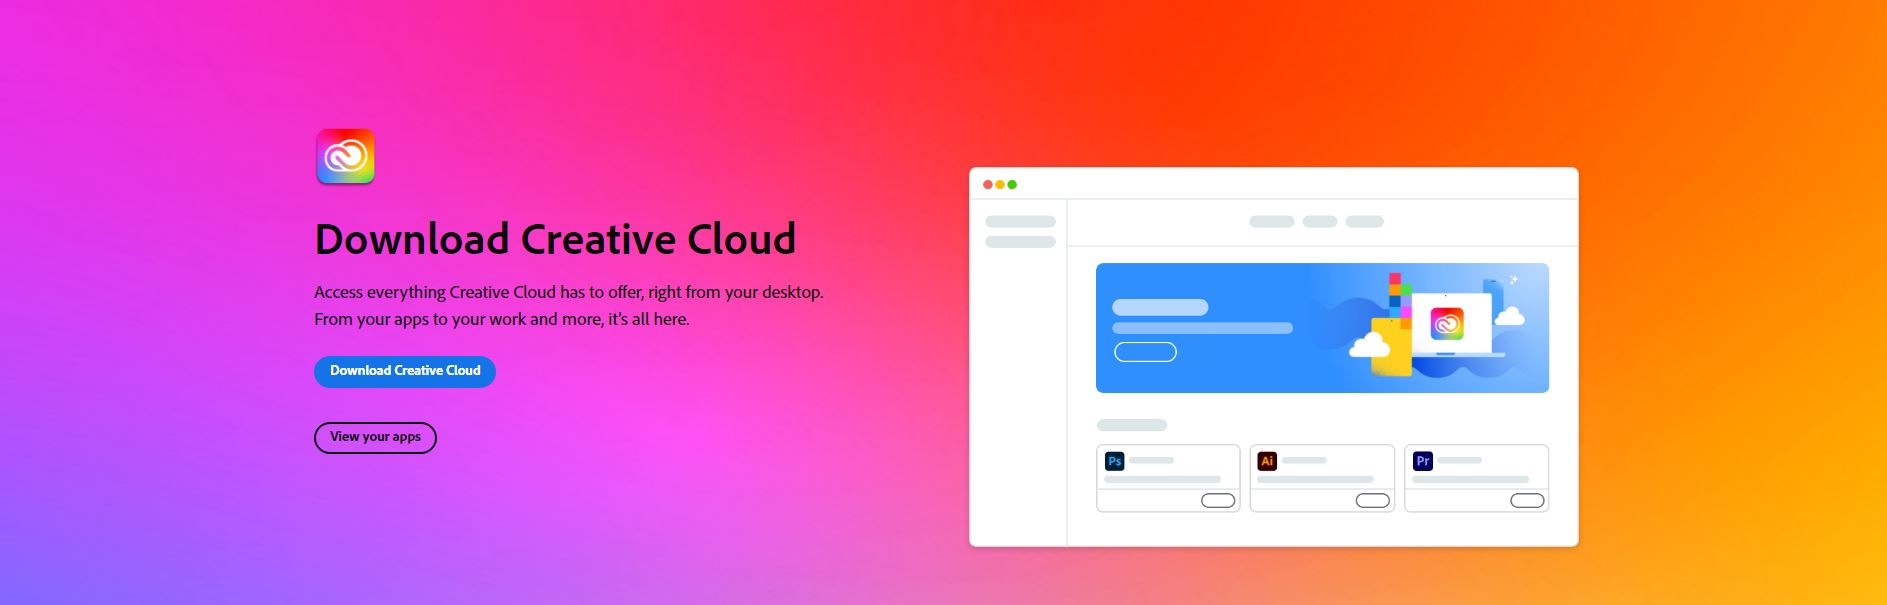
Step 1
Go to the Adobe Creative Cloud download page.
Step 2
Click “Download Creative Cloud”.
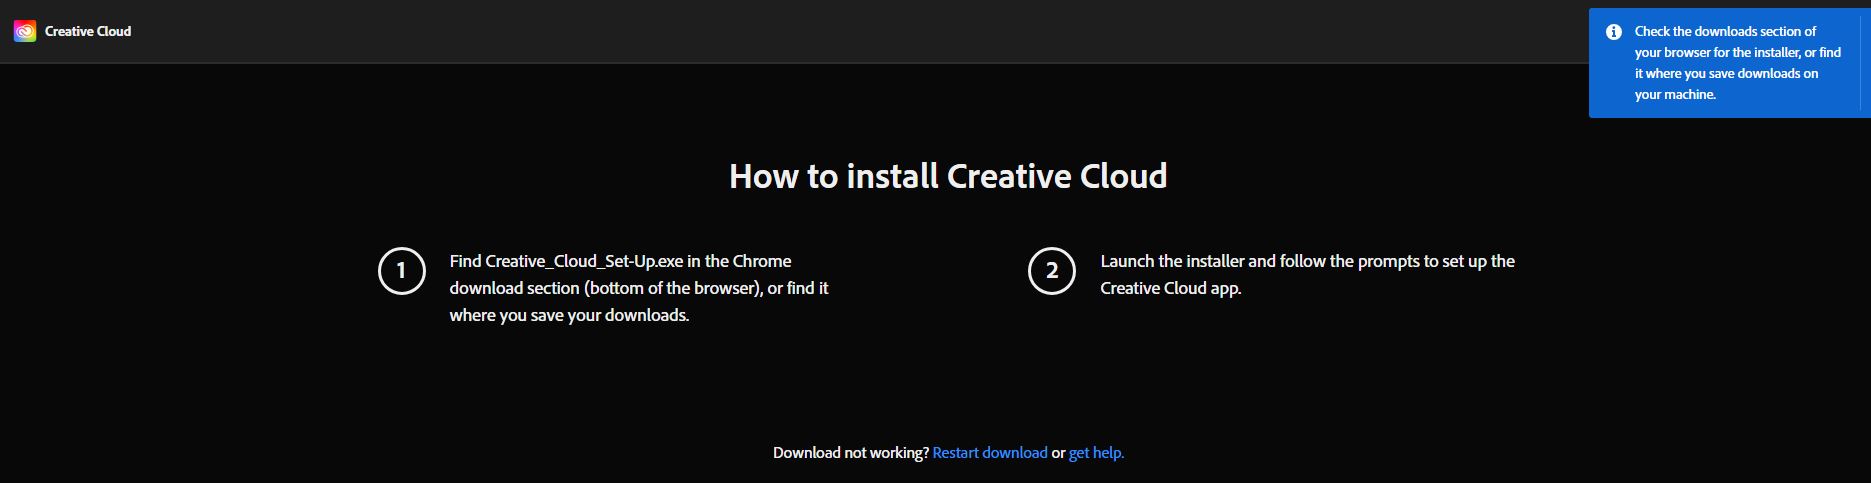
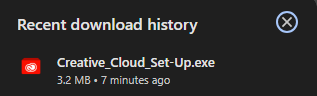
Step 3
While it is downloading, you will see this screen, and once it has downloaded, the .exe file will appear in the top right corner of your screen.
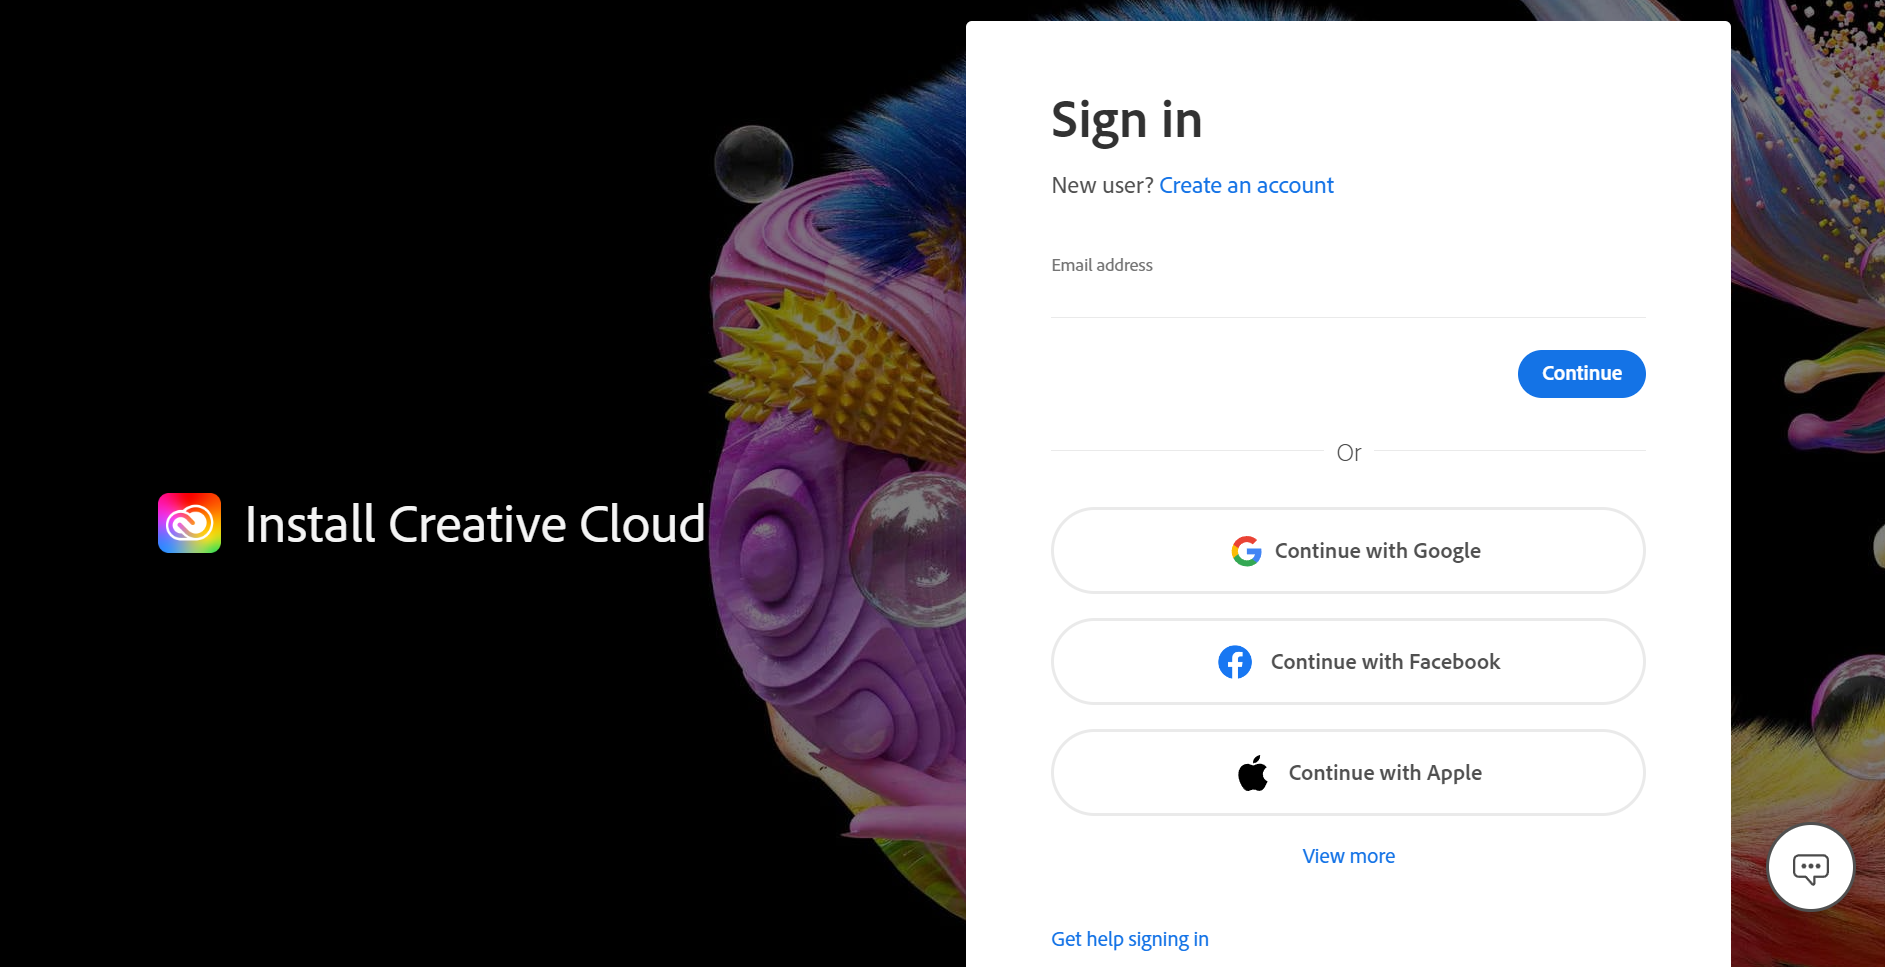
Step 4
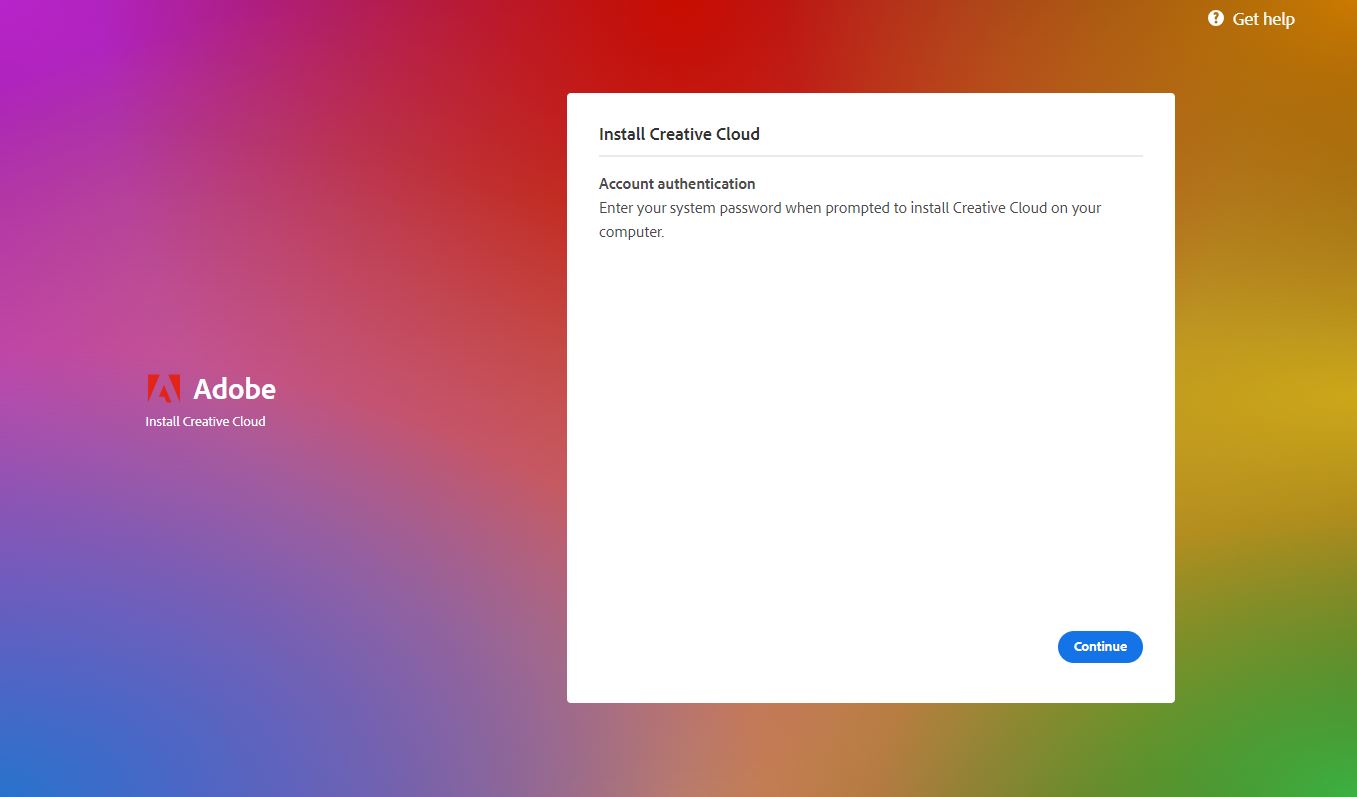
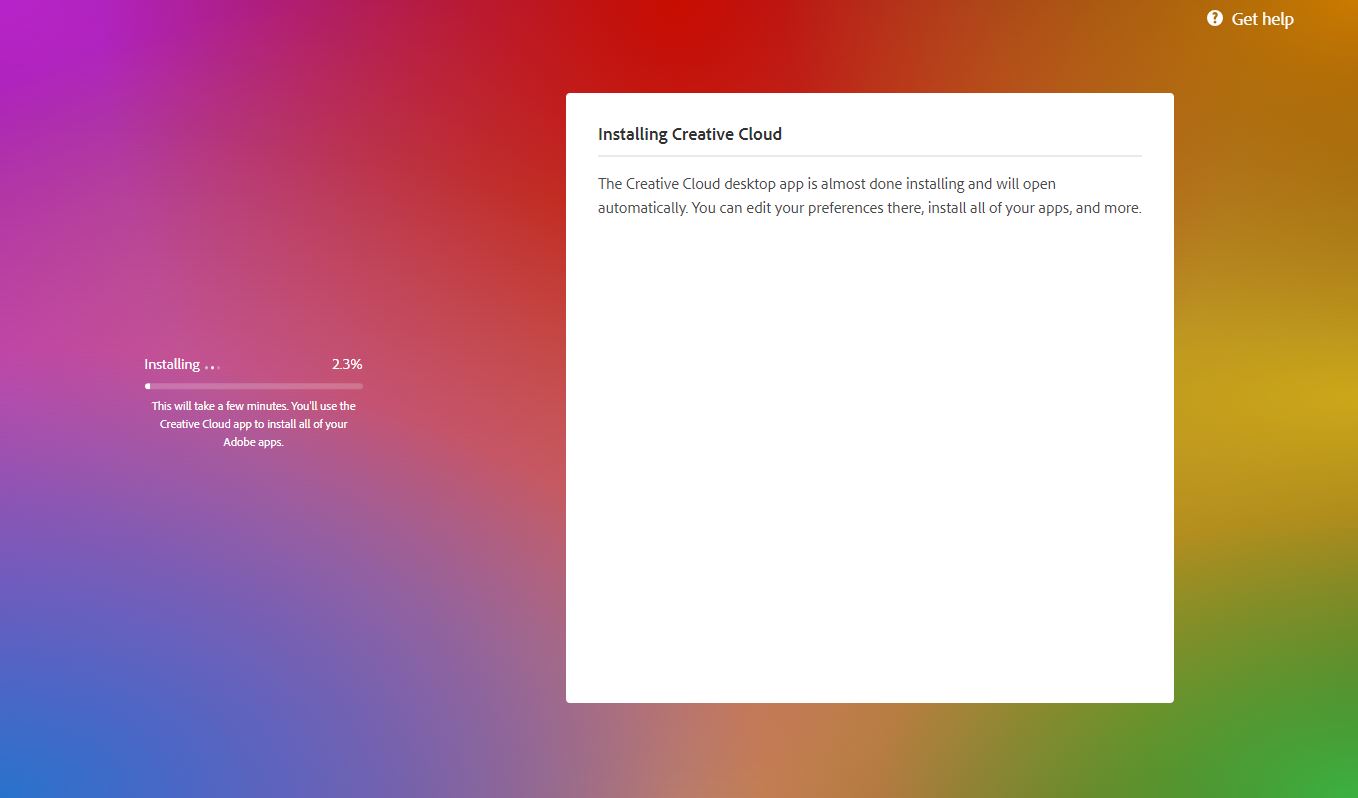
After clicking on the .exe, the Adobe Creative Cloud installer will launch. Enter your firstname.lastname@shc.tas.edu.au and your Josie password into the sign in boxes. When the “Account authentication” prompt appears, enter the password you use to log onto your laptop. It will then start installing Adobe Creative Cloud.
Step 5
When it has finished installing, it will launch the app. Click on the Apps tab on the left side of the screen.
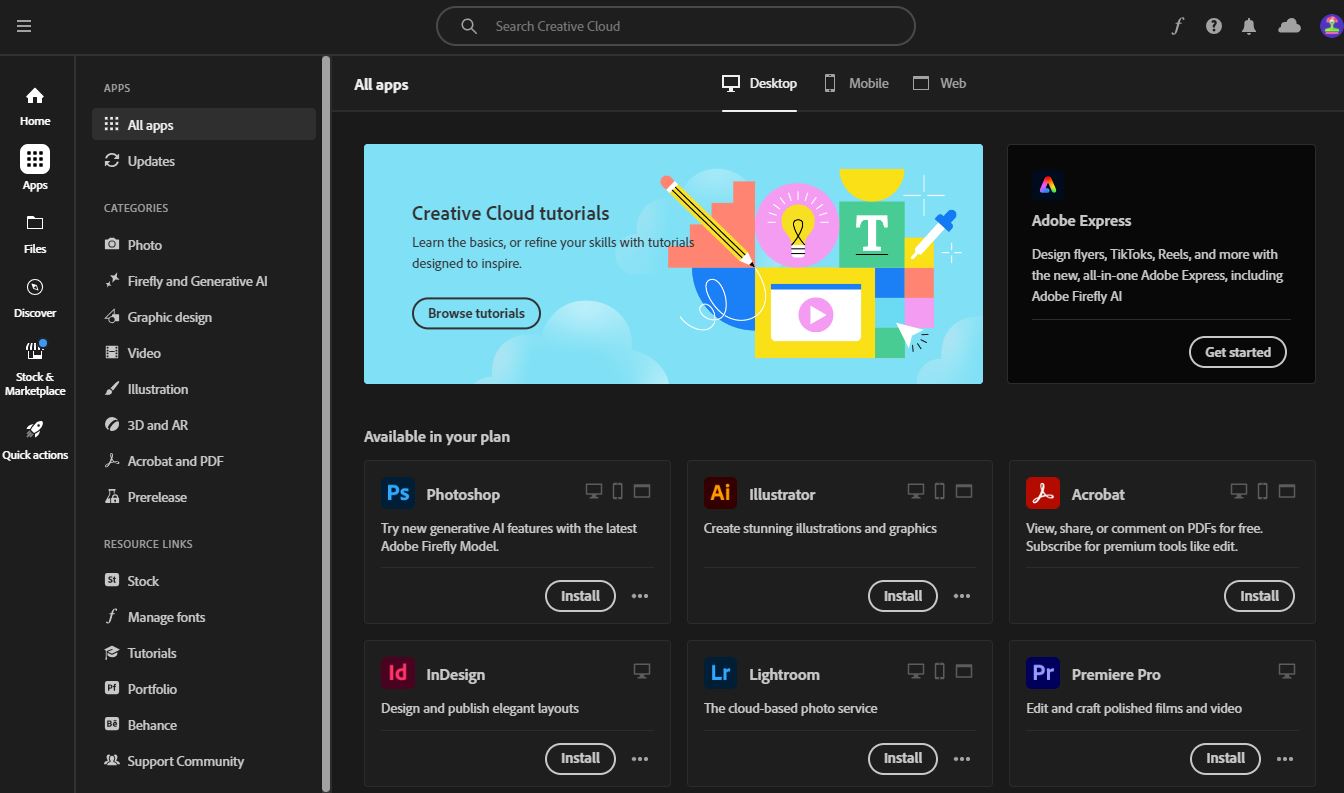
From here, you can install any Adobe Creative Cloud app you’d like.